Why might you wish to do this?
You can scroll a texture for something like a stream, or flow of lava... to give the illusion of moving water etc. You might also use this same technique to make a scrolling text box, something like a news blurb you see scrolling across the bottom of the CNN news screen. (Obviously for some sort of futuristic or planar world).
Some notes before we start:
1) This tutorial was made possible by an idea and set of files (which you don't need) to display a waterfall created by NWN_Baba_Yaga as found in this thread on the Bioware Social Forums.
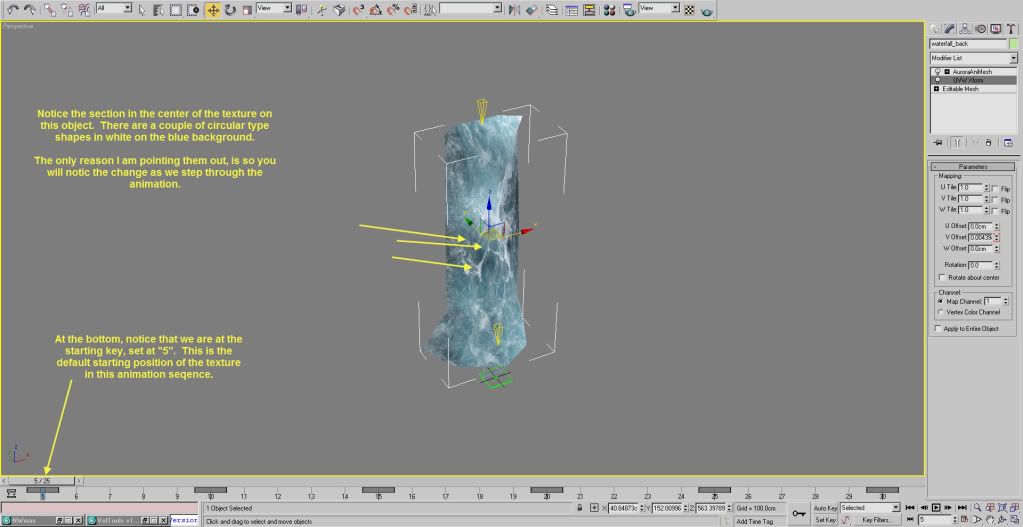
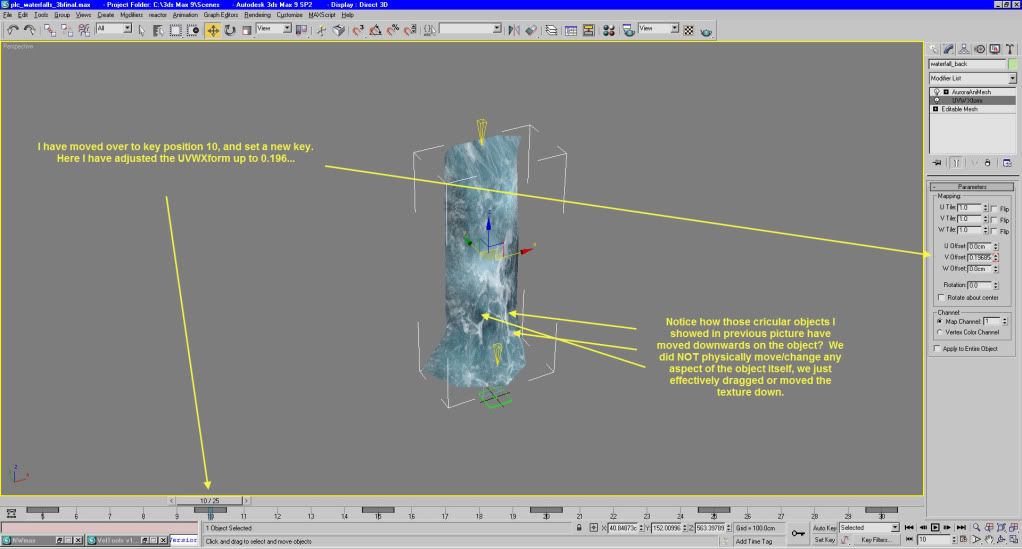
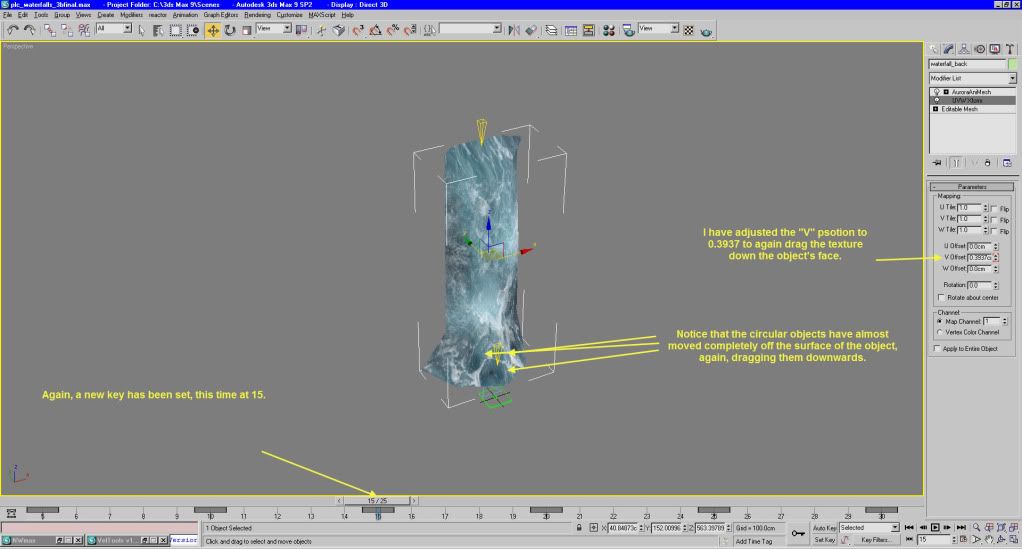
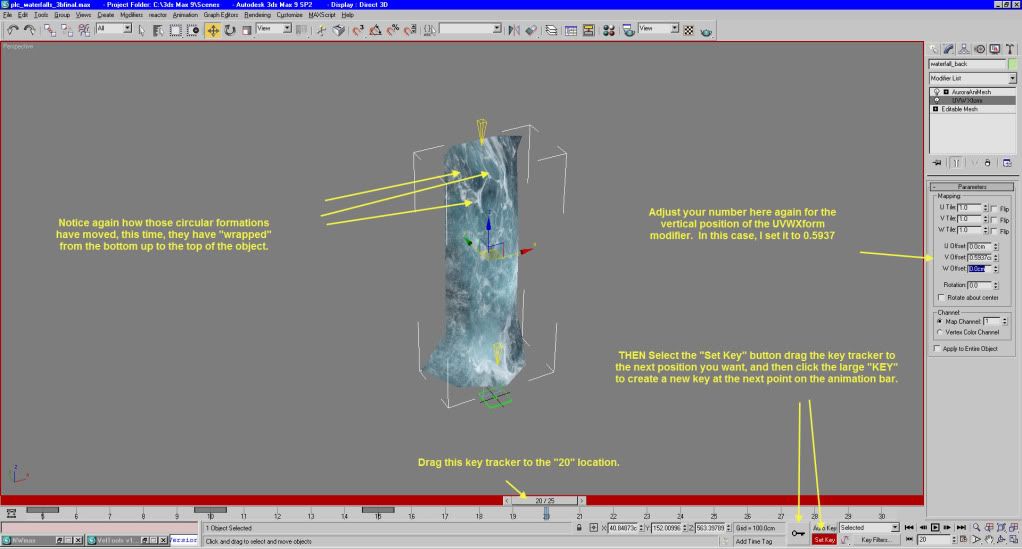
2) We will NOT be actually animating (moving) anything in the object itself. The object will not move from it's original location. The TEXTURE will do the movement. As if the texture was dragged up/down or sideways across an the object.
3) This is really a simple thing to accomplish, but that is assuming you know the basics about using 3ds max, Modifiers, animation bar etc. I will show some of those steps, but anything you find missing that you really need help with, please let me know and I will attempt to adjust this tutorial.
4) There are a LOT of screenshots, but most are just to show how the animation plays out, using still photo's instead of a video.
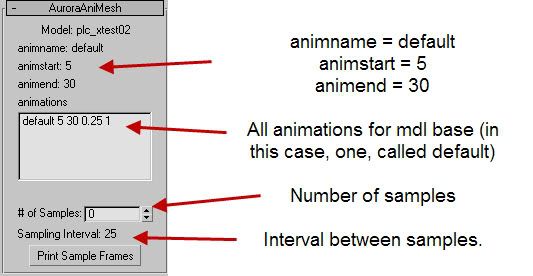
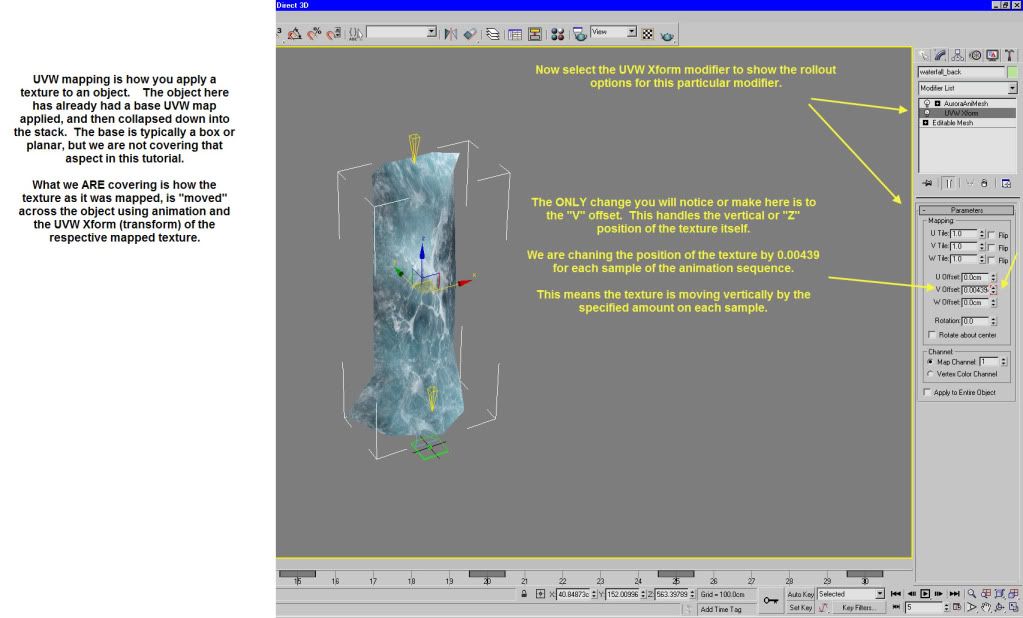
5) We will be using the special NWN AuroraAnimesh modifier, but again, this modifier is not used to actually animate the mesh itself, but to animate the painting of the texture onto that object. This is a distinction you need to keep in mind. The AuroraAnimesh modifier is required to allow you to also use the UVW_X-form modifier, or at least, it is required by NWN to allow that sort of animated texture.
6) This is very, VERY, VERY important. SAVE YOUR MAX SCENE FILE. You WILL need it. The various utilities that allow you to import/export models for use with NWN have a bug that does NOT handle re-importing animations very well. The bugs are various and numerous, and typically completely trash the animation sequences on import. So, save your max scene, using file/save, and append an 01 to the end of the name of it when you save, as in: my_file_01. Then, whenever you save again (Ctrl-s) or File save, 3dsmax will automatically update the end number, as in if you start with my_file_01, max will automatically up that number to my_file_02 etc each time you save. KEEP your max scenes, KEEP the variations. Mistakes are easily made, and very painful when you have to re-start from scratch. Once you have a final working version, you can delete the previous saves, and just keep the final max scene (in case you think you may wish to add/modify/edit) the one you think is final.
Additional notes on things you need:
1) You need 3dsmax (although a lot of this CAN be used in Gmax as well, I don't have Gmax, so I can't tell you how to find the options there.)
2) You need at least one texture that you wish to animate. This texture should have details/features to it that are easily seen. Ie, a flat plain bit of
 plain brown will NOT work. But a detailed texture like
 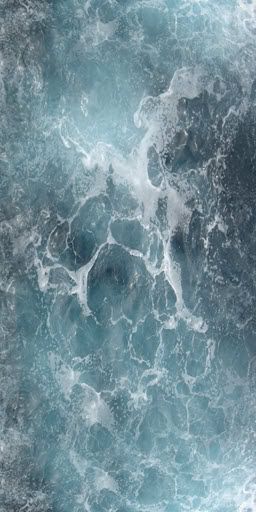 that will give the illusion of motion.
3) You need at least one object on which to paint that texture.